
Master Golf Course Photography: A Complete Shooting Guide
This post contains affiliate links. As an Amazon Associate, we earn from qualifying purchases.
This post contains affiliate links. As an Amazon Associate, we earn from qualifying purchases.
To shoot a golf course well, match three things: a mid-range telephoto lens (a 70-200mm f/2.8 is the default), late afternoon light (not sunrise), and a thorough pre-visit to check maintenance schedules and airspace restrictions. The marine layer at coastal courses like Torrey Pines can burn a $4,000 shoot in under an hour, and the USGA bans drones at all qualifying sites. Good golf photography is about planning against what can go wrong, not chasing perfect conditions.
That checklist turns the process from an art project into a job you can complete. The marine layer, a blanket of low coastal fog, doesn’t care about golden hour. It turns definition into gray-on-gray flat light, and it moves on its own schedule. You either know its patterns or you go home with useless files.
What follows: the three angles every course shot needs, the one lens pros reach for first, and the specific, physical mistakes that cost other photographers thousands before they press the shutter. We’ll also walk through a seven-point scout list that covers everything from aeration schedules to where you’re legally allowed to stand during a tournament.
Key Takeaways
- A 70-200mm f/2.8 lens is the workhorse for a reason; it compresses the landscape to show strategy and separates the subject from a busy background.
- Late afternoon beats sunrise for controlled light and fewer dew-management headaches; schedule around maintenance, not just the sun.
- Check for aeration and topdressing on the course’s public maintenance calendar; brown sand on greens can’t be Photoshopped out convincingly.
- The USGA On-Site Capture Policy explicitly bans drones and restricts any filming inside the ropes; violating this gets you escorted out.
- Scout for microclimates if shooting near an ocean; the marine layer at places like Torrey Pines has ruined more shoots than rain ever has.
The Head-On, Top-Down, and Fly-Through Angles You Actually Need
Most amateurs point a wide-angle lens down a fairway and hope. The shot ends up flat, with everything in the distance compressed into a single, confusing plane. A pro builds the image with three distinct angles, each showing a different layer of the course’s story.
The head-on, or “signature” shot, uses a telephoto lens from behind the tee box or an elevated adjacent fairway. A 70-200mm f/2.8 at 150mm is the usual pick. This compresses the landing area, hazards, and green into a single, strategic frame. The fairway appears narrower, the bunkers more menacing, and the green more distant. It’s the view that explains the hole’s challenge in one glance. You’re not just showing grass; you’re showing the decision the golfer has to make.
A telephoto lens compresses perspective, making distant features like bunkers and greens appear closer together and more integral to the hole’s strategy. This creates a more dramatic and intelligible image than a wide-angle view, which spreads elements apart and can make the course look vast and empty.
Top-down aerials have become the default for course marketing, but there’s a split in how to get them. The easy answer is a drone. The better answer, according to veteran photographer Mike Klemme, is a 140-foot cherry picker. In a 2001 Golfdom article, Klemme argued the angle from a lift is more natural than the straight-down view of a drone; it shows the contour of the land and the relationship between features without the abstraction of a map. A drone shot can look like a diagram. A cherry-picker shot looks like a view a golfer might actually have from a high point. The trade-off is cost and logistics, the lift requires a truck and an operator, where a drone needs one pilot and clear airspace.
The fly-through is the moving version of the top-down, usually captured with a drone on a slow, smooth path along a fairway or over a water hazard. This is pure marketing gloss. It shows flow and scale. The risk is that any sudden movement or wind gust reads as amateurish. The shot only works if it’s steady. If you don’t have a drone with a high-quality gimbal, skip it.
Why Your Kit Lens Is Lying to You (And What to Use Instead)
Your camera’s 18-55mm kit lens tells you it can do everything. On a golf course, that’s a lie. At 18mm, it makes a grand fairway look like a short strip of mown grass with tiny, insignificant hazards. At 55mm, you’re still too close to show the hole’s story. The landscape demands a longer, faster lens.
The default is a 70-200mm f/2.8. I’ve watched photographers show up with a bag of primes and a wide zoom, only to keep the 70-200 mounted for 90% of the day. The zoom range lets you frame precisely from a fixed position, vital when you can’t always walk onto the fairway. The f/2.8 aperture lets you isolate a foreground detail, like a dew-covered spiderweb on a tee marker, while throwing the background into a soft blur. For crop-sensor bodies like the Nikon D500, remember the multiplier. A 70-200mm becomes a 105-300mm equivalent field of view. That’s often perfect.
For true aerials or detailed green complexes, you’ll want longer glass. A 100-400mm or 200-500mm gives you reach without needing to be on the course itself. That’s how you shoot a course while it’s open for play, from a distant hill or the clubhouse roof. The trade-off is weight and cost. A 200-500mm f/5.6 is a beast. You’ll need a monopod or a solid surface to rest it on.
The other piece of gear people overlook is a circular polarizer. It cuts the glare off wet grass and water hazards, turning a shiny, blown-out pond into a reflective mirror. It deepens the blue of a clear sky. It’s a simple filter that makes a bigger difference to your final image than any lens upgrade below the professional tier.
The Torrey Pines Marine Layer Lesson: A $4,000 Cautionary Tale
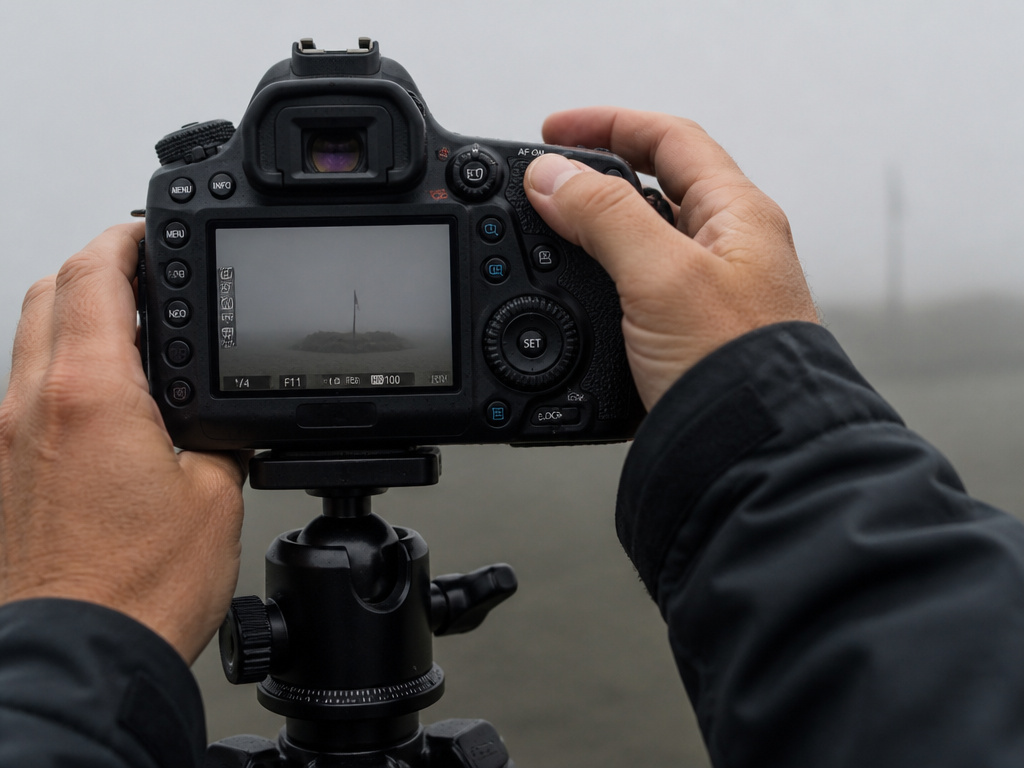 I read about a photographer who spent four thousand dollars on flights, rentals, and gear to shoot Torrey Pines. He was on the cliffs at 5:30 AM, tripods set, waiting for a sunrise that never came. The marine layer, a thick, persistent coastal fog, rolled in and stayed. After five hours, he packed up three thousand gray, low-contrast files that looked like they were taken in a parking lot.
That’s the reality of microclimates. Golden hour is a suggestion near an ocean. The marine layer doesn’t burn off on a schedule. At Torrey Pines, success often means waiting days for a thirty-second window where the sun dips below the cloud deck and lights the bluffs. You can’t plan a one-day shoot there and expect hero shots. You book three days and hope one delivers.
The fix is obsessive local research. Don’t just check the weather app for “sunny.” Talk to the course superintendent. Ask about typical burn-off times for the month you’re visiting. Look at historical weather data. For coastal courses, late afternoon is usually more reliable than morning, the fog has often lifted by then. The point is to let the local climate dictate your schedule, not the other way around. If you need guaranteed sun, shoot a desert course.
Scout Like a Pro: The 7-Point Pre-Shoot Checklist
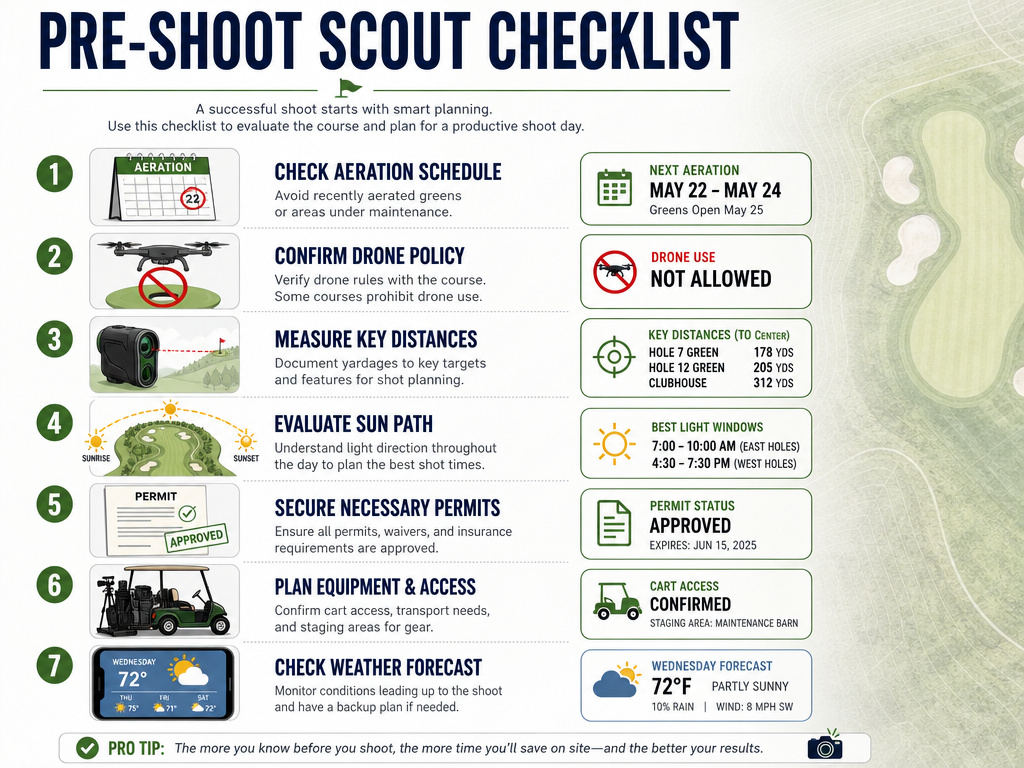 Scouting a course for photography is a different game than playing it. You’re looking for sight lines, light angles, and potential obstructions. Skipping this step is how you end up with a beautiful shot of a maintenance shed you didn’t notice.
1. Check the maintenance calendar. This is the single biggest amateurs miss. Courses publish aeration, verticutting, and topdressing schedules. Showing up the day after greens have been punched means your photos will show brown sand and little dirt plugs everywhere. You can’t Photoshop that out. A quick call to the superintendent or a look at the club’s website calendar saves the trip.
2. Verify airspace and drone regulations. This isn’t just about FAA rules. The USGA On-Site Capture Policy explicitly bans drones at all qualifying sites. Many courses near airports or in protected natural areas, like Torrey Pines (next to a gliderport), have their own strict no-drone policies. Violating these can mean federal fines and confiscation of your gear.
3. Identify key vantage points. Walk the course with a rangefinder or a zoom lens. Find the elevated spots on adjacent holes that give you a clean line to your target green. Look for places where the course routing creates natural framing, like a tunnel of trees or a bend in a canyon.
4. Note the sun’s path. Use an app like PhotoPills or Sun Seeker to see exactly where the sun will rise and set relative to your chosen holes. For most courses, the late afternoon sun from the west provides the best side-lighting to show off contours and golf course architecture. Backlight can be dramatic for silhouettes, but front light (sun behind you) often looks flat.
5. Get permission for out-of-bounds positions. If your perfect shot requires standing in a native area, on a neighboring property, or on a closed course, get written permission. Rangers and homeowners will challenge you. A permit or a simple email from the club manager prevents a shut-down twenty minutes into your shoot.
6. Plan for access and equipment transport. Can you drive a cart to your spot? Do you need to hike gear up a hill? A 140-foot cherry picker needs a truck and a flat, stable deployment area. A simple shot list saves you from carrying a full kit to a location where you’ll only use one lens.
7. Have a weather contingency. Coastal fog, sudden storms, high winds, know what will cancel your shoot and what you can work around. An overcast day can provide beautiful, even light for intimate detail shots of bunkers or greens, even if it ruins your grand panoramas.
Light, Dew, and Grass Length: The Superintendent’s Brief
They control the variables that turn a scene from messy to pristine. Don’t just show up and start shooting. Brief them.
Light timing is the first request. Most superintendents prefer late afternoon shoots. Morning light may be beautiful, but it conflicts with mowing, watering, and course setup. An afternoon slot means the crew is done, and the course is in its best playing condition, which is also its best photographic condition.
Dew is a tactical choice. A blanket of dew on fairways can add incredible texture and sparkle. It can also show every footprint and equipment track. The photographer in the Golfdom archive article noted that sometimes you want to keep the dew for effect. If you don’t, a few passes with a dew whipper or a quick blast from the sprinklers right before you shoot can knock it off. You have to ask.
Grass length is the final touch. For most shots, you want the course at its standard playing height. But if the course has recently been overseeded, the photographer in that same article recommended leaving the grass a touch longer. “It really glows in an image when the sun shines through it,” he wrote. That backlighting through longer blades creates a halo effect you can’t get with tight turf.
Common mistake: Scheduling a shoot the day after greens are aerated. The little sand-filled holes are impossible to edit out convincingly, and they signal poor preparation to any viewer who knows the game.
Shooting Tournaments: The USGA Rules You Can’t Bend
Photographing a USGA qualifier or championship is a different sport. The organization’s On-Site Capture Policy is the law, and it’s specific. Understanding these rules is the price of admission.
First, drones are strictly prohibited at all qualifying sites. That’s a hard ban. Second, anyone with a camera must be credentialed, and that process starts with the local Allied Golf Association running the event. You can’t just walk on with a media badge from another tournament.
Once credentialed, your movement is restricted. You are never allowed on tee boxes, greens, or any area “inside the ropes,” which includes fairways and bunkers. You cannot film from directly behind a player or in their putting line. Your position must always clear the line of sight for other players in the group. If a competitor asks you to stop recording, you stop.
The style of photography changes here. You’re capturing moments, not landscapes. A 70-200mm lens is again your best friend, letting you work from outside the ropes. You need a shutter speed faster than 1/1250sec to freeze the golf ball in flight. Autofocus needs to be fast and reliable. This is where a camera like the Nikon D500 or a Canon R6 shines, they’re built for speed.
The goal is to be invisible. The clunk of a mechanical shutter can be a distraction during a player’s swing. Many pros now use cameras with silent electronic shutters for this reason. You’re there to document the competition, not become a part of it.
The One Lens I’d Buy Tomorrow
If I had to pick one lens for golf course photography from today forward, it’s the 70-200mm f/2.8. Brand doesn’t matter as much as the specs. Nikon, Canon, Sony, they all make superb versions. It’s the focal length that does the work.
The zoom range is perfect for compressing a par 5 into a single strategic frame from 250 yards away. The f/2.8 aperture lets you shoot in lower light, like the fleeting minutes of blue hour after sunset, and gives you that creamy background separation. It’s also a workhorse for shooting golfers in action during tournaments from outside the ropes.
For a crop-sensor body, the equivalent is a 50-150mm f/2.8. The principle is the same: a fast, mid-range telephoto zoom. Everything else, a wider lens for establishing shots, a longer telephoto for distant aerials, is supplementary. Start with the 70-200. Master it. Your photos will improve more from learning where to stand than from any other piece of gear.
Frequently Asked Questions
What is the best time of day to photograph a golf course?
Late afternoon is generally more reliable than sunrise. The light is warmer, shadows are longer to show contour, and you avoid morning dew and conflicts with the maintenance crew’s schedule. Always check the course’s maintenance calendar first, aeration trumps golden hour every time.
Can I fly a drone over a golf course for photography?
It depends entirely on the course and the airspace. Many courses prohibit drones for safety and privacy. The USGA bans them outright at all its qualifying sites. Always get explicit, written permission from course management and verify there are no local FAA restrictions (e.g., near airports) before you fly.
What camera settings should I use?
Start with Aperture Priority mode (A or Av). Set your aperture to f/8 to f/11 for deep focus across the landscape. Use a low ISO (100-400) for clean images. Let the camera choose the shutter speed, but ensure it’s fast enough to avoid blur (1/250sec or faster). For action shots of golfers, switch to Shutter Priority (S or Tv) and set it to at least 1/1250sec to freeze the ball.
Do I need a permit to photograph a golf course?
If you’re shooting for personal use from public areas, usually not. If you’re shooting commercially, using a tripod or large gear on a public course, or filming during a tournament, you likely need a permit. Courses like Torrey Pines, which are part of a public park system, are strict about commercial filming permits.
How do I make the fairways look so green?
Polarizing filter is the biggest help, it cuts glare from wet grass, saturating the green. Shooting during golden hour adds warmth. In editing, you can adjust the green hue and luminance sliders, but the foundation is capturing the right light on well-maintained turf to begin with.
Before You Go
One final rule most guides skip: if your dream shot depends on perfect weather at a coastal course, book three days minimum. One gets burned by fog, one might be windy, the third might deliver. That’s the reality of working with natural light on a landscape that changes by the hour.
The best golf course photos aren’t about the gear. They’re about the preparation. They come from knowing where the sun will be at 4:47 PM, from checking the aeration schedule six weeks out, and from having the right permit in your pocket when the ranger walks up. Strip it back to a simple plan, a reliable lens, and a stubborn willingness to wait for the light to do its job. That’s when the course tells its story.
