
How to Read Greens in Golf: The Unmentioned 6-Inch Speed Drop
This post contains affiliate links. As an Amazon Associate, we earn from qualifying purchases.
This post contains affiliate links. As an Amazon Associate, we earn from qualifying purchases.
To read greens in golf, you must separate popular myths from agronomic facts. Green speed typically decreases about six inches from morning to afternoon, grain is dictated by water drainage and mower patterns, not the sun, and the true break is always downhill. A reliable system involves reading the overall slope from a distance, confirming it from the low side, and then committing to a speed-based line.
That six-inch daily speed loss is a sourced fact from PGA Tour and USGA championship data, not guesswork. It changes how you practice and how you judge long putts late in a round.
What follows is a breakdown of the three physical forces that move your ball, the two most persistent myths that cost strokes, and a simple, repeatable three-step routine used by good putters under pressure.
Key Takeaways
- Green speed decreases an average of six inches daily from morning to afternoon, contrary to TV commentary. Turf growth and thatch decompression are the causes.
- Grain direction is created by water drainage and mowing patterns, not phototropism. On closely mown greens, its effect on break is minimal.
- The ball always breaks downhill, toward the lowest point of the green. Ignore generic rules about breaking toward lakes or mountains.
- Speed dictates break. A firm putt takes less break; a dying putt takes more. Decide your speed before you pick your line.
- Use a three-step read: 1) Survey the overall slope from 20 feet away, 2) Walk to the low side for a true view of the tilt, 3) Finalize your line from behind the ball, matching it to your chosen speed.
The Two Biggest Myths About Green Speed
Golf commentary repeats two ideas that sound logical but are agronomically wrong. Believing them will misread your putts every round.
The first myth is that dry, windy conditions make greens faster as the day goes on. The second is that grain grows toward the setting sun. Both are contradicted by data from the people who measure these things for a living.
Common mistake: Assuming firm, dry greens are faster. At the 2013 U.S. Open at Merion, greens remained at championship speed despite rain saturation. Soil moisture has a negligible effect on green speed; turf growth and thatch do.
Myth 1: Greens Get Faster Throughout the Day
Brian Whitlark, a USGA agronomist, states that data from hundreds of days and thousands of greens shows speed typically decreases from morning to afternoon. An Oregon State University study of 7,200 Stimpmeter readings confirmed an average loss of six inches in ball-roll distance.
Paul Vermeulen, a PGA Tour agronomist, notes the same six-inch daily drop at tour events. The cause is turf growth. Even with growth regulators, grass blades lengthen microscopically, increasing friction. The other factor is thatch, the spongy organic layer beneath the turf. Morning mowing and rolling compress it; it decompresses over hours, slowing the surface.
| Time of Day | Green Speed Trend | Primary Cause |
|---|---|---|
| Early Morning | Fastest | Thatch compressed, minimal growth |
| Mid-Afternoon | 6+ inches slower | Thatch decompressed, turf growth |
| Late Day | Slowest | Maximum growth, full thatch rebound |
This means your pre-round putting green routine is critical. If you practice at 8 a.m., the course greens will be slower by your back nine. Lag putts need more pace.
Myth 2: Grain Grows Toward the Setting Sun
The idea that grass leans toward the sunset is a persistent story. Dr. Bingru Huang, a turfgrass physiologist at Rutgers University, states that at mowing heights below 1/8 inch, turf leaves do not reorient toward light. Phototropism is negligible.
Grain is created by water flow and mowing patterns. Water runs downhill, and grass grows in the direction it’s pushed by mowers and topdressing. If a green slopes from back to front, the grain will almost certainly run down that slope. Look for a shiny versus dull appearance, shiny means you’re looking down-grain (faster), dull means into the grain (slower).
This changes your read on Bermuda greens, where grain is strong. The break will follow the drainage, not the compass.
The Three Physical Forces That Move Your Ball
Reading a green is physics, not magic. Three things change your ball’s path: slope, grain, and surface friction. Slope is the boss.
Slope is gravity’s path. The ball will always break downhill, toward the lowest point. Your job is to find that fall line, the steepest path down the slope. Every putt curves toward that line.
Grain is a speed modifier. On Bermuda greens, grain can significantly affect pace. Putting down-grain (shiny) can add two or three feet of roll on a long putt. Putting into the grain (dull) can kill it short. On bentgrass, the effect is subtler but still real, it changes how much the ball will curve based on your speed.
Surface friction is the wild card. This includes moisture, thatch, and recent maintenance. A damp green is slower. A recently aerated green is bumpy and slow. Fresh sand from topdressing can create inconsistent roll. This is where understanding local green maintenance practices pays off.
The interaction is simple: slope dictates direction, grain and friction dictate how much the ball will curve for a given speed. Which brings us to the core principle.
Speed Dictates Break: The Golfer’s Golden Rule
You cannot pick a line without first choosing a speed. A firm putt will hold its line longer, taking less break. A dying putt will curve more dramatically as it slows down.
Most amateurs reverse this. They pick a line, then accidentally change their speed with their stroke. The result is a miss that leaves them confused.
Where this goes sideways: Deciding to “roll it firm” to take out break, then making a tentative stroke. The ball dies early, catches the full slope, and misses low.
Commit to one of two strategies for every breaking putt: 1. Aggressive Speed: Hit the putt firmly enough that it only breaks the last 10-15%. This reduces the read’s margin for error but demands perfect distance control. 2. Dying Speed: Allow the putt to die at the hole, playing for maximum break. This requires a more precise read but is more forgiving on distance.
Your choice depends on the putt’s length, slope severity, and the consequences of a miss. There’s no right answer, only a committed one. This is where quality golf balls with consistent feel become invaluable.
A Three-Step System for Repeatable Reads
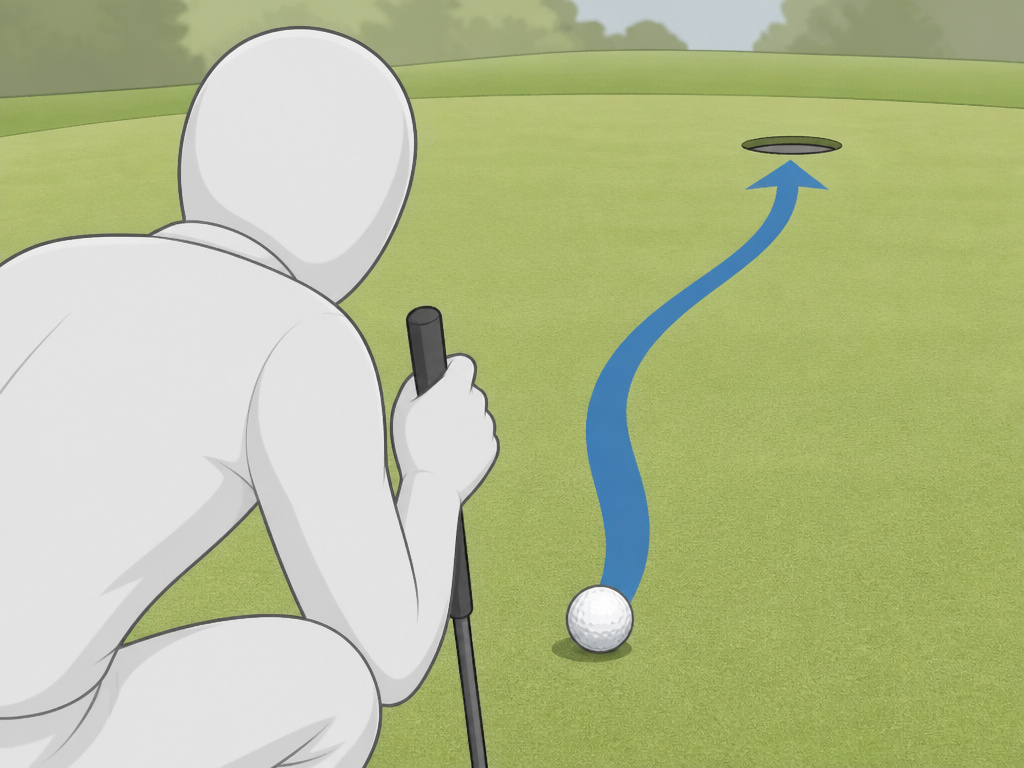
Good putters have a routine. This one is simple enough to use under pressure and specific enough to work on any green, from St. Andrews to your local muni.
Step 1: Read the Macro Slope from a Distance
Start your read before you reach the green. From 20-30 yards out, look at the entire putting surface. Where is the high point? Where would water run off? This tells you the dominant slope.
Look for surrounding features like ponds, bunkers, or valleys. As Lee Trevino notes, older greens often drain toward permanent lakes due to erosion. This step gives you the big picture so you’re not reading blind.
Step 2: Find the Low Side
Walk to the side of the hole that looks lowest. Crouch down. This angle makes the slope undeniable. You’ll see the true tilt of the green relative to your ball and the hole.
This is the most important five seconds of your read. From here, identify the fall line. Imagine pouring water onto the green, where would it run? That’s the direction your putt will want to curve.
Step 3: Finalize the Line from Behind the Ball
Now move behind your ball, on the line you intend to start the putt. Look at the hole. Visualize the ball’s path curving toward the fall line you just identified.
Match this curve to your chosen speed. If you’re putting firmly, visualize a straighter ball. If you’re letting it die, see a bigger arc. Take one last look from the low side if you’re unsure, then commit.
This system eliminates second-guessing. You’ve gathered data from the two most informative angles and made a decision based on physics, not hope.
Tools That Help (And Tools That Hinder)

Your eyes and feet are your primary tools. But technology and equipment can provide support if used correctly.
Your Feet: As you walk the green, feel the slope through your feet. This is the foundation of systems like AimPoint. A pronounced tilt is often easier to feel than see.
Green-Reading Books & Apps: Detailed contour maps are legal in most amateur play. Use them to confirm your read, not replace it. Over-reliance stops you from developing your own skill. Check your read against the book after you’ve gone through your three steps.
Eyewear: Glare is the enemy of seeing subtle slopes. A good pair of polarized sunglasses can cut reflection and improve contrast, making slopes more visible. The right lens tints for golf, like amber or brown, enhance contours in flat light.
Your Putter: Confidence matters more than technology. A putter that feels balanced and allows you to swing smoothly is worth more than one with adjustable weights you never use.
The best tool is a disciplined routine. The worst tool is a hurried glance from behind the ball.
When Your Read Fails: The Usual Suspects
Even with a good system, putts miss. The reason is usually one of these three breakdowns.
You Misjudged the Dominant Slope. This happens when you skip Step 1. You get caught up in a local bump near the hole and miss the overall tilt of the green. Always find the macro slope first.
Your Speed and Line Didn’t Match. You visualized a firm putt but stabbed at it. The ball died and broke twice as much as you played. Commit to your speed and rehearse the stroke to match.
You Ignored Grain on Bermuda. On southern courses, grain can override a subtle slope. A putt that looks flat might creep down-grain. Always note the shine. Learning to read grain is a non-negotiable skill for bermuda greens.
If you’re consistently missing on the low side, you’re under-reading break. If you’re missing high, you’re over-reading it or hitting putts too firm. Keep a simple mental note.
Frequently Asked Questions
Do putts really break towards water?
Not necessarily. They break downhill. If the water is at the low point, then yes. But modern greens are often designed to pitch water away from lakes for irrigation purposes. The ball follows gravity, not folklore.
How much does wind affect putting?
Sustained crosswind can push a slow-rolling ball several inches on a long putt. In heavy wind, putt more firmly to reduce the wind’s time to act on the ball. Downwind putts will be faster; into-the-wind putts will be slower.
Should I plumb-bob to read greens?
Plumb-bobbing only works if your eyes are perfectly level over the ball and you’re on a true side slope. It’s an unreliable method for most golfers and can create false confidence. The three-step distance and low-side method is more reliable.
How do I read super-fast greens?
The principles don’t change, but the margin for error shrinks. On fast greens, speed control is paramount. Take more time in your pre-round routine to feel the pace. On breaking putts, err toward dying speed rather than firm speed, the ball will break more, but you’ll avoid racing it six feet past.
What’s the biggest difference between amateur and pro green reading?
Pros have a systematic routine they trust implicitly. They gather specific information from specific angles, then commit. Amateurs often glance, guess, and doubt. Adopt a routine, and you close 80% of the gap.
Before You Go
Reading greens is a skill built on rejecting myths and trusting a simple process. Remember the six-inch speed drop. Remember that grain follows drainage. Your goal isn’t to be perfect; it’s to be repeatable.
Walk up, see the big slope. Find the low side for the truth. Match your line to your speed. Do that on every putt, and the reads will start to stick. Your three-putts will drop because your first putts will end up closer. The game gets a lot simpler from there.
For more on how course design influences your shots, see our guide to navigating elevated greens and false fronts.
