
Why Your Golf Follow Through and Finish Position Are Crucial
This post contains affiliate links. As an Amazon Associate, we earn from qualifying purchases.
This post contains affiliate links. As an Amazon Associate, we earn from qualifying purchases.
A proper golf follow through and finish position requires matching three things: a backward spine bend of roughly 15 degrees by left-arm parallel, a complete weight shift to the lead foot, and a balanced, held completion of the body’s rotation. Data from GOLFTEC’s SwingTru study shows the lowest handicaps bend their back 15 degrees at release and 31 degrees at the finish, while poor players bend toward the target.
That 15-degree number is the physical signature of a swing that transferred energy correctly and stayed behind the ball through impact. If you finish leaning toward the target, the club almost certainly got steep, the path shifted outward, and you lost both power and the sweet spot.
What follows breaks down the finish from three angles: the measurable data from motion-capture studies, the two weight-shift patterns that actually work, and the specific arm and wrist mechanics that separate a posed finish from a powerful one. By the last section, you’ll know which of the two common pressure patterns you use and the one drill that forces the correct back bend.
Key Takeaways
- Low-handicap golfers exhibit a 15-degree backward bend of the spine when the lead arm is parallel to the ground after impact, per GOLFTEC’s analysis of millions of swings.
- Your finish exposes your earlier swing sequence; a falling-forward or off-balance finish signals early weight shift or an over-the-top downswing.
- There are two valid centre-of-pressure patterns, “reverse” and “front foot”, with no performance difference, meaning your natural weight flow might be fine.
- The arms must fold and rotate after extension, bringing the clubshaft near-parallel to your shoulders, not just whipped across the body.
- A balanced, held finish is a diagnostic tool, not a pose. If you can’t hold it, the swing broke down before the ball.
What Does the Data Say About a Good Finish?
Most advice about the finish is qualitative. “Finish tall.” “Chest to the target.” It’s not wrong, but it misses the specifics that separate a 15-handicap from a 5. Motion-capture studies give us those specifics.
The GOLFTEC SwingTru study, which analyzed millions of swings, found a clear physical differentiator. The lowest handicaps bend their spine backward by 15 degrees by the time their left arm is parallel to the ground post-impact. At the full finish, that bend increases to about 31 degrees. Higher handicaps, in contrast, often bend their spine toward the target.
GOLFTEC’s analysis of millions of golf swings found the lowest handicaps bend their back backwards 15 degrees by the time their left arm is parallel with the ground on the release, and 31 degrees at finish. This backward bend correlates with a shallower angle of attack and higher swing speed.
Why does this matter? A backward bend is the body’s way of counterbalancing the centrifugal force of a club releasing fully around you, not just at the ball. It’s the result of proper pelvis and chest rotation through impact. Leaning toward the target is usually a compensation for a steep, over-the-top swing path where the body stalls to let the arms catch up.
Another study, by Mitchell et al. In 2003, quantified shoulder angles. It found skilled golfers achieve greater right shoulder adduction (over 120 degrees) and rotation (up to 160 degrees). These positions are the outcomes of a well-sequenced kinematic sequence.com/kinematic-sequence-in-the-golf-swing/)** where the lower body leads the downswing, allowing the upper body to rotate fully and freely into the finish.
| Skill Indicator | Low Handicap (<5) | High Handicap (15+) | Why It Matters |
|---|---|---|---|
| Spine Bend at Release | ~15° backward | 0° or forward (toward target) | Backward bend allows full rotation; forward bend indicates early extension & steep path. |
| Weight on Lead Foot at Finish | 85-90% | Often <70%, weight stuck on trail foot | Full weight transfer delivers power and ensures solid contact. |
| Finish Balance | Can hold pose for 3+ seconds | Unstable, step out of finish immediately | Balance confirms controlled energy transfer and efficient sequencing. |
The data tells a simple story. A good finish is earned by what happens before. Your impact position dictates your finish geometry more than any last-second adjustment.
The Two Weight-Shift Patterns (Both Are Valid)
You’ve been told all your weight must be on your front foot at the finish. That’s mostly true, but the path it takes there isn’t universal. Research from Aoife Healy’s 2008 thesis identified two distinct centre-of-pressure patterns in skilled golfers, and neither correlated with handicap or clubhead speed.
The “Front Foot” group does what classic instruction preaches. Their pressure moves steadily toward the target from the top of the backswing through impact and finish. The “Reverse” group shows a more nuanced pattern. After an initial shift forward in the downswing, their pressure moves back toward the back foot just before impact, then forward again into the finish.
Where this goes sideways: Assuming your weight shift is wrong because it doesn’t match a pro’s. The “reverse” pattern is not a technical error, both patterns contain single-digit handicappers. The fault lies in being unable to finish in a balanced finish, not in the path you took to get there.
Why does this matter for you? If you’ve been forcing a weight shift that feels unnatural, you might be fighting your own biomechanics. The critical check isn’t the journey, but the destination. By the end of your golf follow through and finish position, 85-90% of your weight must be on your lead foot. Your trail foot should be up on its toe, acting as a kickstand, not a support pillar.
If you’re falling back or can’t hold your finish, the issue is likely in your proper stance and how you initiate the downswing. A narrow stance or a lateral “slide” instead of a rotation will kill any chance of a stable finish.
The Arm Fold Nobody Teaches
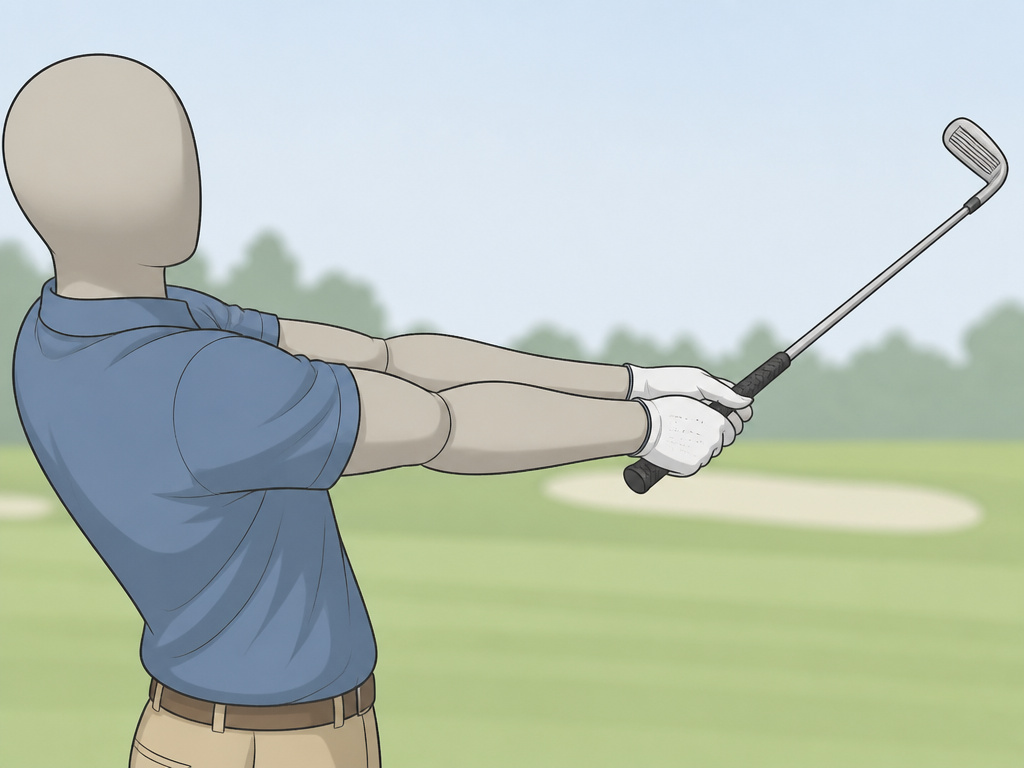
From impact to finish, your arms have a specific job. They must extend fully past the ball, then fold and rotate to complete the motion. Most amateurs either “chicken wing” (bending the lead elbow outward) or violently throw the club across their body with straight arms.
The correct movement mirrors the backswing in reverse. After the “3 o’clock” position (lead arm parallel to the ground post-impact), the elbows begin to fold. The forearms rotate so the clubshaft finishes roughly parallel to your shoulder line, often resting near your upper back. For a full swing, the club points behind you; for a wedge, it’s more vertical across your chest.
| Arm Phase | Correct Action | Common Mistake | Result of Mistake |
|---|---|---|---|
| Immediate Post-Impact | Full extension toward target. | Collapsing lead elbow (“chicken wing”). | Loss of power, weak fades or slices. |
| Mid Follow-Through (3 o’clock) | Begin folding elbows, start forearm rotation. | Keeping arms rigid, forcing club across body. | Inconsistent path, loss of balance. |
| Finish | Elbows soft, shaft near-parallel to shoulders, finish held. | Club whipped around neck, finish unstable. | No diagnostic value, poor swing replication. |
This folding is the result of the body’s rotation pulling the arms along. If you have to manipulate it, your body rotation stopped.This is where many players struggle to release the club properly, they try to do it with their hands instead of letting their pivot do the work.
A good drill is the “9-to-3 to Finish.” Hit shots with a 9-to-3 swing (backswing to parallel, follow-through to parallel). Then, actively practice folding your arms and rotating your forearms to bring the club up to a full finish position from that 3 o’clock spot. This builds the muscle memory for the second half of the follow-through that full-speed swings often blur.
Common Finish Faults and What They Expose
Your finish is a diagnostic report card. Each flaw points to a specific breakdown earlier in the swing. Here are the big three.
Falling Backward or Toward the Target: This is the most telling. If you’re leaning toward the target at the finish, you almost certainly “early extended”, stood up out of your posture through impact. This usually comes from using your upper body to start the downswing, causing a steep angle of attack. Your body lurches forward to try to shallow the club. The fix is in the transition: start the downswing with your lower body, not your arms.
The “Flying Elbow” Finish: If your right elbow (for a right-handed player) is sticking out wide and high at the finish, it often traces back to a disconnected backswing where that elbow drifted behind you. The downswing then becomes an over-the-top casting motion. This flaw directly sabotages any chance of a controlled finish position and is a primary cause of a slice.
Unable to Hold Finish / Stepping Out: This is a pure balance issue. It signals that your swing’s energy wasn’t directed toward the target efficiently. Your stance might be too wide or too narrow, or your weight never fully committed to the lead side. It can also stem from an incorrect ball position that forces you to compensate mid-swing. Practice half-swings, focusing on finishing completely still and holding it for a three-count.
Common mistake: Chasing a picturesque finish by posing for it. A perfect finish earned by a flawed swing teaches you nothing. A slightly awkward finish that results from a powerful, on-sequence swing is the goal. Work backward from impact.
Drills to Build a Powerful, Balanced Finish
These drills target the cause, not the symptom. They ingrain the feelings that lead to a proper finish.
- The Punch Shot to Hold Drill: Take a 7-iron and make a 3/4 backswing. Hit a low punch shot with the specific intent of finishing with both arms extended toward the target and your weight fully on your lead foot. Hold that finish for five seconds. This drill eliminates the complexity of a full swing and isolates the feeling of a complete weight transfer and forward spine bend.
- Step-Through Drill: Hit a normal shot, but as you follow through, allow your trail foot to step forward toward the target, finishing with your feet together. This is an exaggerated move that physically prevents you from hanging back on your trail side. It forces the weight shift and rotation needed for a powerful golf follow through and finish position.
- Feet-Together Drill: Hit mid-irons with your feet touching. This is a brutal test of balance and sequence. You cannot lunge or sway. You must rotate perfectly around your spine to hit the ball and finish in balance. If you can do this, your full-swing finish will stabilize instantly.
These are feedback tools. The punch shot drill tells you if you can transfer weight.The step-through tells you if you can rotate. The feet-together drill tells you if you have a pivot or just a shift.
Frequently Asked Questions
Why is the follow-through important if the ball is already gone?
The follow-through is the only undeniable evidence of what happened at impact and before. You can fool yourself on takeaway or backswing position, but you can’t fake a balanced finish. It proves you delivered the club on a good path, with proper sequence, and transferred your energy. A flawed finish guarantees a flawed swing.
How much of my weight should be on my front foot at the finish?
Aim for 85-90%. Your trail foot should be up on its toe, providing only enough support to maintain balance. If your trail foot is flat, your weight is stuck. This stuck weight is a root cause of fat shots, thin shots, and a lack of power.
What causes a chicken wing in the follow-through?
Chicken wing” (lead elbow bending out) is almost always a compensation for an open clubface at impact. The body subconsciously bends the elbow to help square the face. The real fix is earlier in the swing, often in the grip or wrist conditions in the downswing. It can also stem from a fear of hitting the ground, causing a premature scoop.
Is a high finish or a low finish better?
It depends on the shot. A full driver or iron swing should generally finish with the hands high and the clubshaft over the shoulder or across the back. A wedge or knockdown shot will finish lower, with the hands more in front of the chest and the shaft more vertical. The high finish is a product of full release and speed; the low finish is for control.
Can I improve my finish without hitting balls?
Absolutely. Practice your pivot and arm fold in a mirror. Without a club, get into your impact position (weight forward, hips open). Then, simulate the follow-through by rotating your chest fully to the target and folding your arms into the finish. Hold it. This “dry swing” practice builds the neural pathways without the distraction of ball flight.
The Bottom Line
Stop treating your finish as a photo op. Treat it as the one honest piece of feedback your swing gives you. That backward spine bend, that full weight shift, that quiet fold of the arms are the signature of force applied correctly.
The data shows a 15-degree difference between good players and struggling ones. Your body knows how to find that angle if you let the swing sequence happen in order: lower body, torso, arms, club. The drills that feel the most awkward are usually the ones you need most. If you can’t hold a finish on a punch shot, you have no business trying to fix your driver.
Work from the ground up. Get your proper stance and weight shift solid. Let that dictate your pivot. Let that pivot pull your arms through. The finish will take care of itself, and for the first time, you’ll be able to hold it because you earned it.
