
The Essential Guide to Penalty Area Rules and Edge Cases in Golf
This post contains affiliate links. As an Amazon Associate, we earn from qualifying purchases.
This post contains affiliate links. As an Amazon Associate, we earn from qualifying purchases.
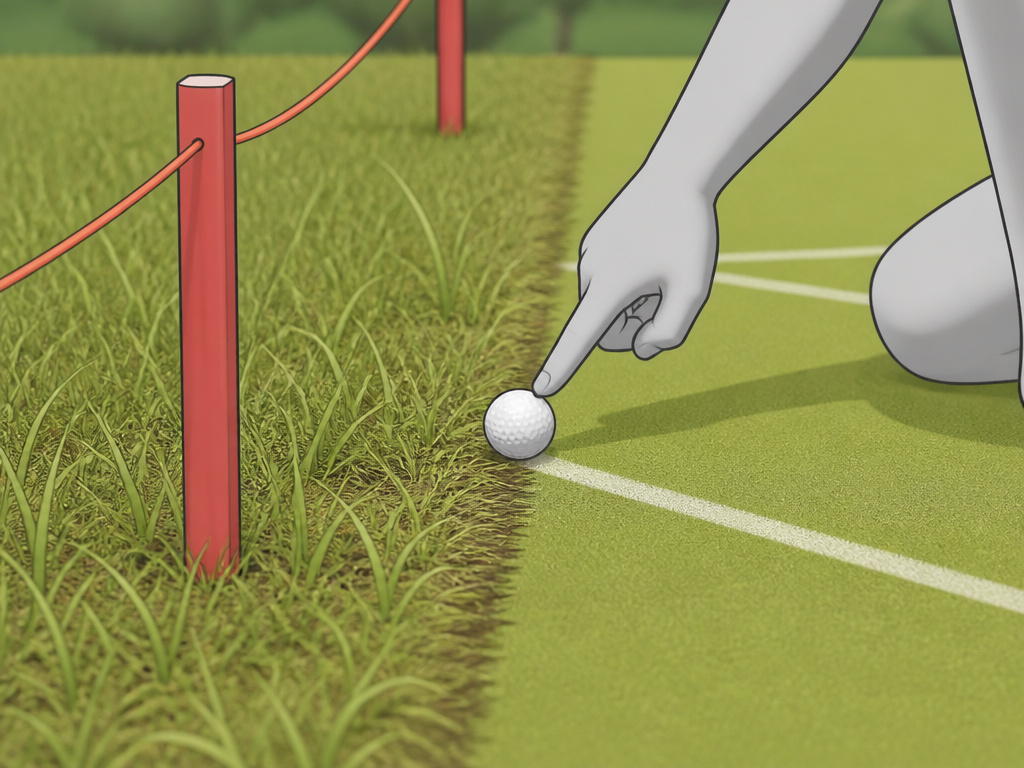
A ball is in a penalty area if any part of it touches the ground or an object inside the edge. You can play it as it lies with no extra penalty, or take a one-stroke penalty for relief outside the area. The key variable is the stake color: yellow penalty areas offer two relief options, while red stakes add a third lateral relief option within two club-lengths.
That edge definition is literal. A ball hovering over the water but touching a reed inside the line is in. A ball sitting on the line’s paint is in. This physical threshold is the only thing that triggers the special set of rules under Rule 17.
What follows is a breakdown of the three relief options, the mechanics of each drop, and the specific edge cases, like improperly marked areas and correcting a wrong drop point, that official interpretations cover but most summaries skip.
Key Takeaways
- The stake color dictates your relief options: yellow offers back-on-the-line and stroke-and-distance; red adds lateral relief.
- You can never take free relief from an abnormal course condition (like a bridge or sprinkler head) when your ball lies inside a penalty area. Your only out is a penalty stroke.
- If you guess wrong on where your ball last crossed the edge but realize it before playing the dropped ball, you must correct the error. Play on with the wrong drop, and you’re playing from a wrong place.
- The “known or virtually certain” standard (95% sure) applies for a lost ball near a penalty area. If it’s equally likely to be in the penalty area or an adjacent abnormal condition, you must take penalty relief.
- You are allowed to ground your club and remove loose impediments when playing a ball from within a penalty area.
The Two Penalty Area Colors and What They Mean
Penalty area stakes aren’t just decoration. Yellow and red are a code that unlocks different sets of relief options, all costing one penalty stroke. The choice is made by the course committee and is almost always based on the geometry of the hazard relative to the hole.
A yellow penalty area is typically one where the only practical way forward is to go back, either on the line to the hole or all the way to where you last played from. A red penalty area, often running alongside the line of play, offers a side-door exit with lateral relief.
The most common mistake is treating all water as the same. Look at the stakes before you decide on a plan. Here’s the breakdown of your options from the moment your ball is in the hazard.
| Stake Color | Relief Option | Key Limitation |
|---|---|---|
| Yellow | Back-on-the-Line Relief | Keep the estimated crossing point between you and the hole. |
| Yellow | Stroke-and-Distance Relief | Go back to where you made your last stroke. |
| Red | Lateral Relief | Within two club-lengths of where the ball last crossed the edge. |
| Red | Back-on-the-Line Relief | Same as yellow option. |
| Red | Stroke-and-Distance Relief | Same as yellow option. |
Back-on-the-line relief is the most commonly used but least understood option. You can go back as far as you want on a straight line from the hole through the spot where your ball last crossed the penalty area edge. Your relief area is one club-length in any direction from where the dropped ball first hits the ground, but it cannot be nearer the hole than that reference point.
Lateral relief, the exclusive red-stake option, lets you drop within two club-lengths of that same crossing point. This is the option that saves you from having to hit over the same hazard again. It’s crucial for understanding other relief options on the course.
Your Three Relief Options, Mechanically
Knowing the names isn’t enough. You need to know the physical procedure, where to drop, and what happens if you mess up the drop.
1. Back-on-the-Line Relief
This isn’t a suggestion to drop in the general vicinity. You must establish a specific reference line. The point where your ball last crossed the edge is the anchor. Draw an imaginary line from the hole straight back through that point. You can move any distance back on that line.
Where this goes sideways: Not physically marking your reference point. The R&A official Rule 17 interpretations recommend placing a tee to mark the spot. If you don’t, and you drop even a foot closer to the hole, you’ve dropped in a wrong place. The penalty for playing from a wrong place in stroke play is two strokes.
Your drop must be in the relief area. That’s a circle with a one-club-length radius from where the ball first touches ground. If it rolls outside this area, you must re-drop. If it happens again, you place it where it first hit on the second drop.
2. Lateral Relief (Red Stakes Only)
This is the shortcut. Find the spot where your ball last crossed the edge of the red penalty area. Measure two club-lengths from that point. Your relief area is anywhere within that two-club-length radius, except any part of the penalty area itself. You can measure across a narrow penalty area to find your spot on the other side.
The two club-lengths are a radius, not a diameter. A common mental error is picturing a four-club-length wide area. It’s two club-lengths from the single reference point. This option is why knowing the difference between red stakes and yellow stakes is a round-saver.
3. Stroke-and-Distance Relief
This is your reset button. It always exists, for any penalty area or even a lost ball. You take one penalty stroke and go back to the spot where you made your last stroke. If that was the tee, you’re now hitting three.
It’s often the least desirable option because it costs both a stroke and distance. But on a tight hole where back-on-the-line leaves you in deep rough or behind a tree, it can be the smart play. It’s the same fundamental penalty as hitting out of bounds.
What Can (And Can’t) You Do In a Penalty Area?
The rules inside the penalty area are more permissive than you might think, but they lock the door on several common get-out-of-jail-free cards.
You CAN:
- Ground your club lightly behind the ball.
- Take practice swings that touch the ground or water.
- Remove loose impediments (leaves, stones) and movable obstructions (trash).
- Stand inside the penalty area to play a ball outside it.
You CANNOT:
- Take free relief from an abnormal course condition. That bridge over the water? The sprinkler head? If your ball is inside the penalty area, they are just part of the hazard. No free drop.
- Declare your ball unplayable. Rule 19 (Unplayable Ball) does not apply inside a penalty area. Your only relief is under Rule 17’s penalty options.
- Play a provisional ball. If you think your ball is lost in a penalty area, you cannot hit a provisional. You must go forward to determine if it’s “known or virtually certain” to be in the hazard. This is a major strategic difference from a ball potentially lost in the general area.
This last point is critical. The “known or virtually certain” standard (about 95% certainty) is what allows you to use the penalty area rules for a lost ball. If you can’t meet that standard, you must revert to the lost ball rule, which is stroke-and-distance.
Edge Cases and Official Interpretations
 The rulebook has specific clarifications for situations where the basic procedure breaks down. These are the non-commodity specifics most players never learn until they get burned.
Easy to miss: If a ball is lost in an area where a penalty area and an adjacent abnormal course condition (like ground under repair) are equally likely, the player must take penalty relief under Rule 17. You don’t get the benefit of the doubt for free relief.
The Improperly Marked Hazard
Stakes get moved, fade, or are placed incorrectly. The official interpretation (USGA Rule 17.1a/1) is clear: if a body of water is clearly part of a penalty area, a ball in it is in the penalty area even if it’s technically outside misplaced stakes. You can’t claim it’s casual water.
Correcting a Wrong Reference Point
You and your partners guess where the ball crossed. You take lateral relief based on that guess and drop. Then, before you play the dropped ball, someone finds your original ball 20 yards farther up, proving your guess wrong. * You must correct the error. Pick up the dropped ball and re-drop using the correct reference point. * If you play the dropped ball from the wrong spot, you’ve played from a wrong place. In stroke play, that’s a two-stroke penalty. This interpretation (17.1d(3)/2) is a lifesaver if you catch the mistake in time.
Measuring Lateral Relief Across the Hazard
For a narrow red penalty area, your two-club-length relief area can extend to the other side. You can measure your two club-lengths from the reference point across the water to find dry ground. However, any part of the penalty area within that two-club-length circle is not part of your relief area. Your ball cannot come to rest in the water.
What Happens If You Play From a Penalty Area and Hit It OB?
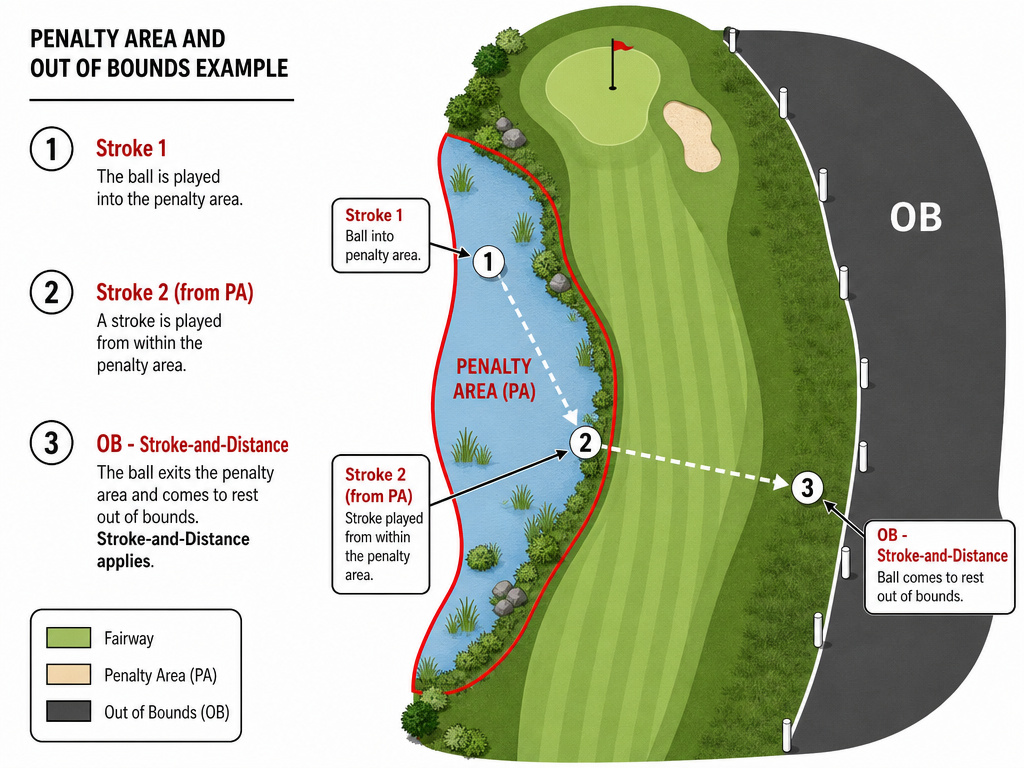 The scenario unfolds in layers. You hit into a red penalty area. You decide to play it as it lies. You swing, and the ball sails out of bounds.
1. You are now lying two (your original stroke + the stroke from the hazard).
2. The ball is now OB. You must take stroke-and-distance relief for the OB.
3. Your options are to go back to where you played inside the penalty area (lying 4, hitting 5) or take back-on-the-line/lateral relief from the penalty area based on where that last shot entered the OB (also lying 4, hitting 5).
The scenario unfolds in layers. You hit into a red penalty area. You decide to play it as it lies. You swing, and the ball sails out of bounds.
1. You are now lying two (your original stroke + the stroke from the hazard).
2. The ball is now OB. You must take stroke-and-distance relief for the OB.
3. Your options are to go back to where you played inside the penalty area (lying 4, hitting 5) or take back-on-the-line/lateral relief from the penalty area based on where that last shot entered the OB (also lying 4, hitting 5).
It’s a compounding penalty situation. The USGA’s Rule 17 page provides detailed examples showing that the most efficient path is often to take penalty relief from the hazard before attempting a heroic shot.
Penalty Areas vs. Bunkers and Other Hazards
It’s useful to contrast the rules. A waste area is often treated as part of the general area, not a penalty area. You can ground your club and take free relief from obstructions.
Bunkers have their own strict set of bunker rules, primarily prohibiting you from grounding your club before the stroke. Penalty areas have no such restriction. This is a fundamental difference in how you can interact with the hazard before the shot.
The unifying theme is that each defined area of the course, general area, teeing area, penalty area, bunker, putting green, has its own specific rules. Confusing them is a fast track to penalty strokes.
Frequently Asked Questions
Can I move loose impediments in a penalty area?
Yes. You can remove leaves, stones, twigs, or any other natural loose impediments. You can also move movable obstructions like a discarded water bottle. This is one area where penalty areas are less restrictive than bunkers.
What if my ball is on the line of a penalty area?
If any part of the ball is touching the line (the paint, the edge of the water, the ground inside the stakes), the ball is in the penalty area. The line itself is part of the area. If the ball is completely outside and not touching the line, it’s in the general area.
Is “known or virtually certain” the same as “I think it’s in there”?
No. “Known or virtually certain” is a high bar, meant to be about 95% certainty. You must have visual evidence (like seeing it splash) or have eliminated all other reasonable possibilities. Simply not finding your ball in long grass near a penalty area is not enough. If there’s any reasonable chance it’s elsewhere, you must proceed under the lost ball rule.
Can I take a drop inside the penalty area?
No. All penalty relief options under Rule 17 require you to drop a ball outside the penalty area. The only way to play from inside is to play the ball as it lies.
Where can I read the full, official rule?
The definitive sources are the governing bodies. You can review the R&A 2023 Rules of Golf PDF for the complete rulebook, or visit their websites for digital versions. For a broader context, our guide to the basic rules provides a foundation.
The Bottom Line
Penalty area rules hinge on two things: the color of the stakes and the exact point your ball last crossed the edge. Master the three relief options and remember the restrictions, no free drops for immovable obstructions, no provisional balls, and no declaring an unplayable lie.
The edge cases are where rounds are saved or lost. Mark your reference point with a tee. Know that you can correct a wrong drop before you play it. And understand that if you’re not 95% sure it’s in the water, the lost ball rule with its stroke-and-distance penalty is waiting. Keep a copy of the basic rules in your bag, and when in doubt, take the penalty stroke that gives you a clean shot. One stroke is cheaper than two for playing from the wrong place.
