
The Complete Golf Backswing Sequence Explained for Consistency
This post contains affiliate links. As an Amazon Associate, we earn from qualifying purchases.
This post contains affiliate links. As an Amazon Associate, we earn from qualifying purchases.
The golf backswing sequence is a ground-up kinetic chain: feet and lower body initiate the turn, the torso and shoulders coil against the hips, and the arms and club are the last to move. This creates torso-pelvic separation, the essential coil that stores power. The average tour pro’s transition from backswing to downswing lasts just 55 milliseconds, a timing window dictated by your muscle fiber type.
Forget positions. The sequence is the motion that gets you there. A perfect top-of-backswing pose is useless if you arrived there by lifting your arms instead of coiling your core. The power isn’t in the pose; it’s in the stretch between your turning shoulders and resisting hips that happens on the way up.
What follows is the breakdown of that motion: the four-part sequence that builds the coil, the biomechanical data on why it works, the one critical mistake that leaks all your power, and the drills that make the right feel automatic.
Key Takeaways
- The sequence starts from the ground: your lower body moves first, not your hands or shoulders.
- Power comes from torso-pelvic separation, your shoulders turn significantly more than your hips, creating a coiled spring.
- The transition from backswing to downswing is not simultaneous; the hips must start moving forward before the shoulders unwind. This gap averages 55 milliseconds for pros.
- A shorter, controlled three-quarter backswing often produces more consistent power than a long, loose overswing by maintaining the coil.
- Your natural muscle fiber composition (fast-twitch vs. Slow-twitch) influences your ideal transition timing.
The 4-Step Backswing Sequence (From the Ground Up)
A powerful backswing isn’t a single movement. It’s a domino effect. Each segment triggers the next, building elastic energy. Break the chain at any link, and the whole structure fails.
The kinematic sequence for power is lower body, torso, shoulders, arms, club. If your arms run ahead of your torso in the backswing, you lose the connection that transfers force from the ground into the clubhead.
1. The Foundation: Lower Body Initiation
Your feet and legs are not passive platforms. The first move is a subtle pressure shift into the inside of your trail foot, accompanied by the beginning of a hip turn. Your hips should rotate, but not excessively. Think of them as an anchor. Their primary job is to resist the upper body’s turn, creating tension.
If your hips turn as much as your shoulders, you’ve just made a full-body sway. There’s no coil, no stored energy. You’ll have to manufacture power from your arms on the way down, which leads to weak, inconsistent strikes.
2. The Coil: Torso and Shoulder Turn
As your lower body sets the anchor, your torso, specifically your thoracic spine, rotates. This is your shoulder turn. The goal is to maximize the difference between your hip turn and your shoulder turn. This difference is often called the X-Factor.
Your arms are still relatively passive here. They are being pulled back by your turning chest. If you feel your biceps working, you’re pulling the club with your arms instead of turning your body. The feel should be wide, not high.
3. The Wrists: Last to Set, Not First
The wrist hinge is a consequence of a full body turn and the weight of the club, not an independent action. As your shoulders near their limit, the club’s momentum will naturally begin to cock your wrists. Forcing an early wrist hinge with your hands is a common power leak. It disconnects your arms from your body and makes the swing arms-dominated.
A proper hinge keeps the club on plane and sets the angle you’ll deliver into the ball. A forced hinge just adds a moving part you have to time perfectly later.
4. The Top: A State of Loaded Tension
At the top, you shouldn’t feel loose or stretched out. You should feel loaded. Your trail side, from your glute to your lat, should feel tight, like a spring compressed. Your weight is predominantly on the inside of your trail foot. Your lead arm is relatively straight (but not rigid), and the club is supported, not held.
This is a position of athletic potential, not a checkpoint for aesthetics. From here, the downswing sequence can begin correctly.
| Body Segment | Its Job in the Sequence | Common Mistake & Consequence |
|---|---|---|
| Lower Body | Initiates turn, creates a stable anchor for the coil. | Swaying or over-rotating hips. Kills tension, forces an arms-driven downswing. |
| Torso/Shoulders | Creates the X-Factor coil by turning against the hips. | Spinning shoulders level with hips (no separation). Eliminates power storage. |
| Arms | Stay connected, are pulled by the torso. | Lifting or pulling the club independently. Breaks the kinetic chain, loses power. |
| Wrists | Hinge naturally as a result of body turn and club momentum. | Actively cocking wrists early. Disconnects arms, creates timing nightmare. |
The Critical Transition: Where Most Swings Break
The move from backswing to downswing is the most important, and most botched, part of the sequence. This isn’t about starting the downswing. It’s about how you start it.
Where this goes sideways: Starting the downswing with your shoulders or hands. This “firing from the top” throws the club outside the ideal path, causing an over-the-top move, a slice, and a complete loss of power. The hips must lead.
The research from the Titleist Performance Institute (TPI) is clear. Using 3D motion capture, they found the average transition time for male tour professionals is about 55 milliseconds. This is the gap between when the lower body starts moving toward the target and when the shoulders begin to unwind.
The low end of their database is 17 milliseconds. This variation isn’t random error; it’s physiology. Golfers with a higher proportion of fast-twitch muscle fibers can have faster, more explosive transitions. Those with more slow-twitch fibers may need a slightly longer loading phase. Your body type influences your ideal tempo.
The mechanical why is simple. Starting with the lead hip bumping toward the target while the shoulders are still fully coiled increases the torso-pelvic separation further. This eccentrically loads the core muscles to an even higher level, like stretching a rubber band further just before release. When the shoulders finally fire, they do so with more force.
Why a Shorter Backswing is Often a Faster Backswing
Chasing a long, picture-perfect backswing that reaches parallel is a trap for most amateurs. It usually leads to a loss of control, a breakdown in posture, and a slackening of the coil you worked so hard to create.
A compact, three-quarter backswing has two major advantages: 1. It maintains tension. It’s easier to keep your trail side loaded and your wrists hinged when you aren’t over-rotating. 2. It simplifies the downswing. The club has a shorter, more direct path back to the ball, requiring fewer compensations.
TPI data shows that shortening a full swing to a three-quarter swing typically costs only 3-5% in potential clubhead speed. For a 95 mph swinger, that’s 3-5 mph. However, the improved strike quality and center-face contact you gain from a more controlled motion almost always result in more actual distance. You trade a tiny bit of theoretical speed for a huge gain in efficiency.
Drills to Ingram the Proper Sequence
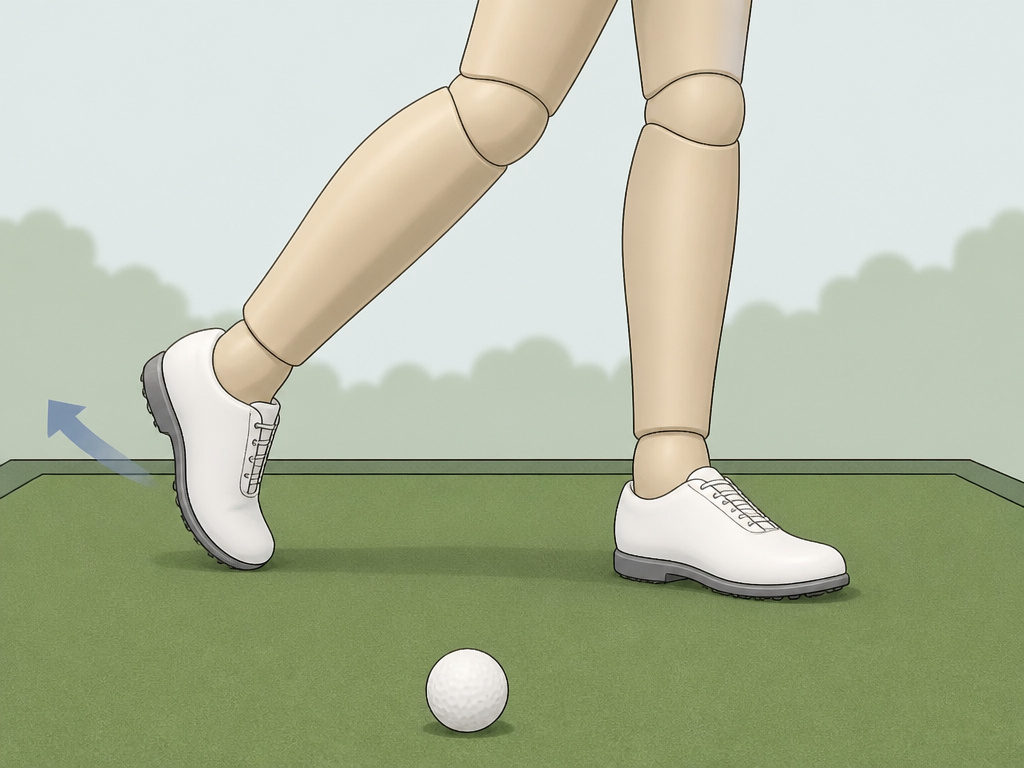
You can’t think your way through a sequence that happens in less than a second. You have to feel it. These drills slow things down and exaggerate the correct sensations.
- The Step Drill: Address the ball normally. To start your backswing, actually step your trail foot back slightly. This forces your lower body to initiate the turn. Hit shots with this exaggerated move to feel the ground-up sequence.
- The Pump Drill: Take your backswing to the top. From there, make a small, deliberate bump forward with your lead hip while keeping your shoulders and hands back. Pause. This is the sensation of the transition starting from the ground. Do not hit from this position; just rehearse the feeling of separation.
- Feet-Together Drill: Hit shots with your feet touching. Any sway or improper weight shift will immediately throw you off balance. This drill rewards a centered, rotational coil and punishes any sequence breakdown.
Common mistake: Practicing these drills at full speed. The point is to move slowly enough that your brain can process the new order of operations. Full speed reverts to habit. Slow motion builds new ones.
Frequently Asked Questions
What is the #1 mistake in the backswing sequence?
Starting the takeaway with the hands and arms instead of the lower body and torso. This immediately breaks the kinetic chain, forcing you to compensate with your upper body during the downswing, leading to inconsistent contact and a loss of power.
How much should my hips turn in the backswing?
Your hips should turn, but significantly less than your shoulders. A good guideline is a 45-degree hip turn against a 90-degree shoulder turn. The restriction of the hip turn is what creates the essential coil. If your hips and shoulders turn the same amount, you’ve just made a sway.
What does “torso-pelvic separation” mean?
It’s the measurable difference in rotation between your pelvis (hips) and your torso (shoulders) at the top of the backswing. This separation stretches the core muscles, storing elastic energy like a wound-up spring. A peer-reviewed golf swing evaluation confirms this separation’s role in generating upper torso rotation velocity, which directly translates to clubhead speed.
I’m not flexible. Can I still create a good coil?
Yes. Flexibility helps, but a proper sequence is more important. Focus on maximizing your thoracic spine rotation (the area between your shoulder blades) rather than just trying to turn your shoulders. Many golfers with limited hip or hamstring flexibility can still create excellent power through efficient thoracic rotation and a proper kinematic sequence.
Should I feel my right elbow straight or bent at the top?
For a right-handed golfer, the right elbow should be bent, roughly at a 90-degree angle, and positioned in front of the right side of your torso. A straight or “flying” right elbow that points behind you often indicates an arm-dominated swing and makes it very difficult to drop the club into the correct downswing sequence.
The Bottom Line
The golf backswing sequence isn’t a collection of positions to hit. It’s a specific order of operations that builds leverage. Power comes from the ground up, stored in the stretch between your turning upper body and resisting lower body. The magic happens in the first 55 milliseconds of the downswing, when your hips move before anything else.
Stop trying to look like a pro at the top. Start trying to move like one from the start. Work on the one-piece takeaway that keeps your arms connected, focus on creating real shoulder turn against a stable hip anchor, and practice initiating the downswing with a quiet bump of your lead hip. A shorter, sequenced swing will always out-power a long, sloppy one.
